How to setup additional mailboxes in an existing sequence
Last updated: May 5, 2026
Setup Additional Mailboxes
Navigate to your Play Builder and select the sequence you want to modify
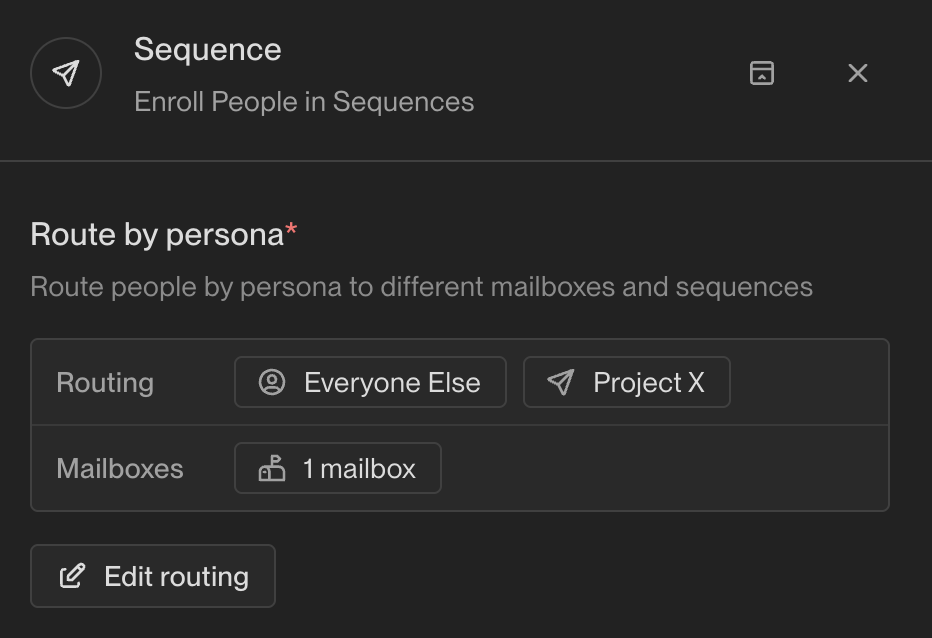
Locate the Sequence node in your play
Find the "routing" section within the Sequence node
Click the "edit persona routing" button to access mailbox settings (note: the mailbox count display itself is not clickable). You can add more specific routing rules using the "+ Add persona route" button if needed. When configuring routing, note that if routing is set to a specific mailbox set, the system will randomly rotate through those mailboxes to distribute the sending load. To ensure emails send from the record owner's mailbox, set routing to "use a mailbox associated with the company/person record owner."
Add your new warmed-up mailboxes to increase send capacity, then republish your play for the changes to take effect.
Mailbox Assignment: Each mailbox should have a 1:1 relationship with its actual owner. The user assigned to a mailbox determines the sender name and email signature used in outbound messages. Verify assignments in Settings > Deliverability > Mailboxes before adding mailboxes to active sequences. Note that if you're using the Assign Owner node in your play, the node may successfully set ownership in Unify but the 'Contact Owner' field may not update if the person was already a synced contact and the play isn't configured to overwrite owner, or if there's a sync/permission issue on writeback.
All mailboxes must be assigned to the mailbox groups used by your active sequences to contribute to send volume. Any mailbox not in a group won’t get sends routed to it, even if it’s warmed and available.
Routing for Unowned Accounts: When configuring routing based on account ownership, the system uses round‑robin distribution for unowned accounts. This ensures appropriate sender‑recipient matching while maintaining consistent sender identity for accounts without assigned owners.
Usage
Once you've added new mailboxes and republished your play, the routing changes will apply to net-new enrollments only. Existing enrollments will continue using their originally assigned mailbox.
When routing is set to a specific mailbox set, the system will randomly rotate through those mailboxes to distribute new enrollments.
Manual One-Off Emails for Urgent Sends
If you need to send more emails than your automated send limit allows (such as for time‑sensitive event invitations), you can send manual one‑off emails directly from contact records. These manual emails are not subject to the 25 emails/day automated send limit, though you should still be mindful of overall deliverability best practices.
Open the contact record you want to email
Send the email directly from their record (these send immediately)
Continue running your sequence for the automated 25 /day sends
Note that there is currently no way to bulk convert existing sequence tasks into manual one‑off emails – manual emails must be sent individually from each contact record.
Technical Requirements for Owner-Based Routing
Node Placement: The Assign Owner node must be placed before the Sequence step in the same branch of your play; incorrect placement will cause routing failures.
User Login Requirement: Users must have logged in at least once for their mailbox to be available for routing; new users who haven’t logged in will cause routing to fail even if mailboxes are assigned.
Fallback Configuration: Configure fallbacks in Settings → Deliverability → Mailboxes for each rep to handle cases where the primary owner’s mailbox is unavailable.
When using specific mailbox set routing with round‑robin distribution, contacts from the same company may be assigned to different mailboxes because assignment happens per contact. To keep all contacts at a company using the same sender, set routing to “use a mailbox associated with the company/person record owner” (owner‑based routing).
Warmed mailboxes are not automatically added to sequences – they must be manually selected in the routing settings to be activated for sending. This is a common source of confusion when users have warmed mailboxes available but limited send capacity.
Ensure mailboxes have been warmed up for at least 21 days before adding them to active sequences to maintain deliverability.
The system uses a round‑robin approach to distribute sending load across selected mailboxes. Distribution works at the contact level – each enrolled contact gets assigned to one specific mailbox, which will send all sequence steps for that contact.
Important: Reassigning mailboxes after emails are already queued will cancel those queued emails and create new enrollments. Finalize your mailbox assignments before starting your sequences to avoid disruptions.
Upgrade Step 1 Enrollments: Enrollments still queued on Step 1 can be upgraded to the latest version to receive the new routing. To upgrade eligible enrollments: open the sequence's Enrollments tab, filter to contacts on Step 1, select them, and choose "Upgrade to latest version."
If you have warmed mailboxes available but limited send capacity, check that all desired mailboxes are manually added to your sequence routing. Having warmed mailboxes available doesn’t automatically increase your send capacity – only mailboxes that are manually selected in the routing settings will be used for sending.
There is no automatic fallback behavior where the system uses the owner's mailbox first and then switches to backup mailboxes when send limits are reached.
Make sure all mailboxes are properly warmed up before adding them to active sequences to maintain good deliverability.
Customer-Owned Mailbox Advantages
While the standard setup uses Pylon-provided mailboxes with 25 emails per day limits, customer-owned mailboxes offer significantly higher capacity:
Customer-owned mailboxes: Can be raised to 65 emails per day upon request
This represents a 160% increase in sending capacity per mailbox compared to Pylon-provided options
Capacity Comparison Examples
The difference becomes significant when scaling:
10 Pylon-provided mailboxes = 250 emails/day (10 × 25)
10 customer-owned mailboxes = 650 emails/day (10 × 65)
For high-volume sequences, customer-owned mailboxes can dramatically reduce the number of mailboxes needed to achieve your target daily send volume.
Critical Domain Limitation for Customer‑Owned Mailboxes: When considering customer‑owned mailboxes for scaling, be aware that additional mailboxes cannot be provisioned on your primary domain. If you’re using your primary domain, you can only increase the send limit on that single existing mailbox (up to 65 emails/day). To add multiple customer‑owned mailboxes for increased capacity, you’ll need to purchase additional domains.
Managing Mailbox Capacity and Email Backlogs
Understanding Send Limits
Each mailbox has a limit of 25 emails per day, which directly impacts your total sending capacity. For Pylon-provided mailboxes, this 25 email limit should not be exceeded as it is optimized for deliverability. If you need higher capacity, add more mailboxes rather than increasing the send limit per mailbox. Use this limit to calculate how many mailboxes you need based on your total daily sending volume.
The system uses a rolling 24‑hour window per mailbox, not a midnight reset. If a mailbox sent 20 emails between 2–5 pm yesterday, it only gets those 20 “slots” back between 2–5 pm today. This causes natural daily fluctuation and explains why you may not consistently hit your theoretical maximum capacity (number of mailboxes × 25).
If you’ve recently added mailboxes to sequences, the backlog needs time to redistribute across them. Until emails are actually queued to those mailboxes, they won’t contribute to daily send volume.
Managing Email Backlogs
If some mailboxes become heavily backlogged while others have capacity, you can manually reassign queued emails to balance the load. Navigate to the Email Backlog dashboard, go to the "Reassign Sequence Enrollments" section, and select "Reassign Enrollments" for the desired sequence. Only enrollments with a status of "queued" can be reassigned. Note that only queued emails (Step 1) can be bulk reassigned through this method - mid-sequence scheduled emails cannot be bulk reassigned and would need to be updated manually.
Backlog metric clarification: The “total emails in backlog” count combines both queued emails and blocked enrollments (e.g., records missing required template variables). Blocked enrollments are included in the total but do not prevent new enrollments from being sent.
The “in use” count on the backlog page reflects mailboxes with pending sends in their queue, not just current group membership. If you’ve removed mailboxes from all groups but they still show as “in use,” they likely have queued emails from before they were removed. Once those queued emails clear out or are reassigned to other mailboxes, they’ll drop off the count.
Dashboard update behavior: The Email Backlog dashboard refreshes continuously as plays fire and sequence steps execute, showing a real‑time snapshot rather than a fixed daily total. For capacity planning, monitor the backlog on a weekly‑average basis to gauge typical end‑of‑day volumes.
Queued vs. blocked enrollments: Bulk reassignment via the dashboard is limited to enrollments with a “queued” status. Blocked enrollments must be manually resolved (e.g., by adding missing template variables) before they can be processed or reassigned.
Reassigning Tasks After Routing Changes: If you've changed your sequence routing and need to update task assignments for existing enrollments, you can bulk reassign tasks through the Tasks tab. Select all relevant tasks and choose "Assign Owner" to update them in bulk. This is particularly useful when switching from company owner to contact record owner routing.
Important: The system does not automatically re-route emails from backlogged mailboxes to available ones. Manual reassignment is currently required to optimize mailbox utilization when capacity issues arise.
Task Assignment Troubleshooting
Troubleshooting Task Assignment Issues: If tasks are being assigned to the wrong users despite correct mailbox routing, check your sequence task assignment settings. If “Manually assign tasks” is enabled in your sequence settings, all tasks will go to the selected user regardless of mailbox routing configuration. To enable owner‑based task routing that matches your mailbox assignments, either disable manual assignment or set it to assign to the mailbox owner.
When configuring manual tasks (such as LinkedIn connection requests) within the sequence steps, you have two assignment options: “Assign to Sender” and “Assign to Mailbox owner”. If you’re using mailbox pools with round‑robin distribution, set manual tasks to “Assign to Sender” to ensure the task is assigned to whoever sent the email for that specific contact. Using “Assign to Mailbox owner” with mailbox pools will cause assignee mismatches, as the email sender rotates but the mailbox owner remains static.
Note that task ownership and mailbox ownership are independent – reassigning task owners will not change which mailbox sends the sequence emails.
Alternative: Configure Task Assignment for New Enrollments: To control task assignment for future enrollments without changing mailbox routing, open your sequence, go to Edit > Advanced Settings, enable “Manually assign tasks,” and select the desired task owner. This assigns all new sequence‑generated tasks (including call tasks) to the specified owner while emails continue sending from the existing mailbox owner. This only affects new enrollments – existing enrollments keep their current task assignments.
If you’ve changed your sequence routing or task assignment settings and need to update task assignments for existing enrollments, go to the Tasks tab, filter by the affected sequence/step, select all relevant tasks, and choose “Assign Owner” to update them in bulk. This is particularly useful when switching routing methods or correcting task assignment misconfigurations.
Strategic Mailbox Management
Consider dedicating specific mailboxes to different types of sequences (e.g., warm outbound vs. cold outreach) to prevent conflicts in send schedules and ensure optimal capacity utilization across all mailboxes. This approach helps maintain consistent sending patterns and prevents one sequence type from overwhelming your mailbox capacity.