How do I unenroll contacts from automated sequences?
Last updated: May 5, 2026
Context
When running automated email sequences, you may need to remove specific contacts from receiving automated emails, especially in cases where you have a personal relationship with the contact or they shouldn't receive automated outreach.
Answer
You can manually unenroll contacts from sequences by following these steps:
All exclusion rules (global, sequence‑level, and audience‑level) also apply to manual enrollments. If a contact matches any active exclusion, they cannot be manually enrolled in that sequence, and there is no per‑contact override.
Navigate to the contact's profile in your account
Locate the "Unenroll" button in the top right corner of their profile
Click "Unenroll" to remove them from all active sequences
Alternative Unenroll Methods
Unenroll from Sequences > Enrollments
Navigate to Sequences > Enrollments
Find the contact you want to unenroll
Select Unenroll to remove them from the sequence
Mass Unenroll Multiple Contacts
Navigate to your sequence's enrollment page
Mass select all the contacts you want to unenroll
Click the Unenroll button to remove all selected contacts from the sequence
To identify which exclusions prevented specific contacts from enrolling in a play, check the individual contact's Exclusions tab in their profile, which shows all global exclusions that apply to them.
This mass unenroll method provides a sequence-specific approach that's particularly useful when you need to remove many contacts from a single sequence without affecting their enrollment in other sequences, offering more granular control than exclusion-based bulk unenrollment.
Automated Unenrollment via Exclusions
You can also configure automated exclusion rules that will unenroll contacts from sequences when certain criteria are met. This is useful for automatically stopping sequences at scale based on business logic.
Enrollment limits such as “Max enrollments per company” are count‑based only and do not consider CRM lifecycle stage, deal status, or active conversations. To prevent outreach when deals are active, use CRM‑based exclusions as described in this article.
Navigate to Settings > Exclusions in your account
Create or edit exclusion rules based on your criteria (e.g., open opportunities, custom fields, lifecycle stage)
Toggle on the setting to remove contacts mid-sequence when they meet the exclusion criteria
Verify that exclusions are enabled at the sequence level by navigating to Sequence > Settings > Ruleset and confirming the desired exclusions are toggled on (sequences use a default ruleset which may have all exclusions toggled off)
Exclusion Evaluation During Sequence Execution
Exclusion rules are evaluated continuously every 15 minutes throughout sequence execution, not just at enrollment. This means contacts can be automatically unenrolled mid‑sequence if their data changes to meet the exclusion criteria. For example, a contact whose “last activity” field updates may be excluded from later steps in the same sequence. Consider adding buffers (e.g., “activity date less than 90 days but greater than 15 days”) to prevent unintended mid‑sequence unenrollment.
When using activity‑based exclusions (e.g., “Recent Manual Email” or “Last activity date within X days”), Unify’s email activity write‑back can update the activity fields and, if the “Exclude from Sequences” toggle is ON, contacts may be removed from the sequence immediately after the first email step. Teams often keep the Sequences toggle OFF for activity‑based exclusions to avoid unintended mid‑sequence unenrollments while still blocking new enrollments. Sending a direct 1:1 email outside of Unify or your CRM sequences does not automatically unenroll contacts unless it triggers an enabled exclusion rule.
Support-Based Recovery for Incorrectly Excluded Contacts
If contacts are incorrectly excluded, you can contact support to have them un‑exclude the contacts and roll the sequence back to the last completed step for the affected contacts. This recovery method can be faster than duplicating and re‑running plays, especially when dealing with multiple contacts or complex sequence structures.
When creating exclusions based on opportunities or deals, you can use Unify Opportunity fields (which pull directly from your CRM) or mirror the opportunity data to a company/account-level field and use Salesforce Account fields. Company-level exclusions will unenroll all contacts at that company's domain when the criteria is met. Note that CRM-based exclusions typically sync and apply within approximately 15 minutes, and domain matching is exact—you may need to add domain variations separately if contacts use different domain formats.
Excluding Only Deal-Associated Contacts (Not Entire Companies)
While Unify Opportunity field exclusions work at the company level and exclude all contacts at a company when deal criteria are met, you can exclude only the specific contacts associated with deals using this workaround:
Create a contact-level custom field in your CRM (e.g., "Has associated deal in stage X")
Use a CRM workflow or automation to populate this field for contacts tied to deals meeting your criteria
Sync this field to Unify
Create a people-level exclusion in Unify based on this contact field instead of using company-level Unify Opportunity fields
HubSpot Property Configuration Requirements
When using HubSpot properties for exclusions, you must reference the property's internal name and internal value rather than the display label. For example, the lifecycle stage that displays as “Customer” has an internal value such as customer. Using the display name will cause the exclusion filter to fail. Check your HubSpot property settings to find the correct internal values.
If the HubSpot property is a multi‑select field, create a single‑select version of the property to use in exclusions.
Troubleshooting Exclusion-Related Enrollment Issues
If you notice fewer contacts enrolling than expected from an uploaded list or audience, you can identify which exclusions are filtering out contacts by navigating to the play and toggling individual exclusions on/off. This will show you which contacts are being excluded by each rule, helping you understand enrollment drop-off and adjust your exclusion settings if needed.
When troubleshooting enrollment issues, first verify that your sequence is using the correct ruleset with exclusions enabled by checking Sequence > Settings > Ruleset (sequences may be set to a default ruleset with all exclusions toggled off). Note that turning off the sequence-level toggle in a Ruleset only affects that specific ruleset. Contacts can still be blocked if the global exclusion itself has “Exclude from Sequences” enabled. To allow contacts to enroll in a specific sequence despite meeting exclusion criteria, you must turn off BOTH the sequence-level toggle in the Ruleset AND the global “Exclude from Sequences” setting for that exclusion. After changing exclusion settings, wait approximately 30 minutes before re‑running plays for changes to fully propagate.
Important: When configuring exclusions, pay attention to the toggle setting:
Toggle ON: Contacts already in sequences will be removed immediately when they meet the exclusion criteria
Toggle OFF: Only prevents new contacts from entering sequences; contacts already enrolled will continue receiving emails
Note: Exclusions can have different toggle settings at the sequence level versus the audience level. If an exclusion is toggled off at the audience level but toggled on at the sequence level, contacts will still be excluded from enrolling in that specific sequence. Sequence-level exclusion settings take precedence over audience-level settings.
Creating Exceptions Within Exclusion Rules
For specific companies: Add an “AND” condition with
domainis not equal toexample.comto exclude that domain from the exclusion rule.For specific contacts: Add an “AND” condition with
emailis not equal tocontact@example.comto exclude that email from the exclusion rule.
Temporarily Disable Exclusion Rule
Disable the specific exclusion rule globally.
Wait approximately 30 minutes for the change to propagate.
Enroll the contact manually or through automation.
Re‑enable the exclusion rule.
Automatically unenrolling all contacts at a company's domain when a deal/opportunity is created or reaches a specific stage (e.g., "1 - Qualification")
Stopping sequences when a meeting is booked
Using custom fields to pause sequences based on other qualification methods (e.g., cold calling results)
Preventing and Resolving CRM-Based Exclusion Timing Issues
Timing Mitigation for CRM-Based Exclusions
To prevent contacts from being enrolled before CRM-based exclusions fully propagate, consider adding a 20‑30 minute delay to plays that trigger immediately after CRM events (such as website visits or form submissions). This buffer ensures exclusion rules have time to sync and apply before automated sequences begin.
Re‑enrolling Incorrectly Excluded Contacts
Toggle off the “Exclude from Sequences” setting in your exclusion rules
Wait approximately 30 minutes for the changes to propagate across the system
Duplicate and re‑run the play with the same audience (rather than just re‑running the existing play)
Enable “allow re‑enrollment into the same sequence” if needed for contacts to re‑enter sequences they were previously in
Additional Technical Considerations
If contacts from excluded accounts are still being enrolled, check for duplicate company records in your CRM, as duplicates can bypass lifecycle‑stage or company‑level exclusion filters.
Advanced Diagnostic Approaches for Complex Enrollment Issues
Multi-CRM Exclusion Considerations
When troubleshooting opportunity-based exclusions, check for active opportunities across all connected CRM systems (Salesforce, HubSpot, etc.), as exclusions evaluate opportunities from all sources simultaneously. A contact may be excluded due to an active opportunity in HubSpot even if their Salesforce opportunity shows as Closed Lost.
Understanding Exclusion Timing Behavior
Contacts matching exclusion criteria may still appear as “queued” in your sequence—this is expected behavior. Exclusions are checked at send time, not at queue time, so contacts will be automatically skipped when the sequence attempts to send. No manual action is needed to remove queued contacts that match your exclusion rules.
Common Enrollment Constraints
Contacts cannot be in multiple sequences simultaneously, including if another sequence is paused. They must be fully unenrolled first before enrolling in a new sequence.
A contact cannot be enrolled in the same sequence twice.
Unsubscribed contacts cannot be enrolled via manual enrollment while global unsubscribe exclusions are enabled.
Click Tracking Limitation for External Booking Links
When setting up automated unenrollment based on meeting bookings, click tracking and click‑based automation only work for links that point to domains where the Unify tracking tag is installed. External scheduling tools and booking links (such as Calendly or Acuity) cannot be tracked automatically for sequence unenrollment.
Redirect Method: Link to a page on your own domain (with the Unify tag) that then redirects to the external booking link.
CRM Integration Method: Trigger unenrollment based on CRM field updates when meetings are booked, instead of relying on click tracking.
Bulk Unenrollment Using Exclusions
For unenrolling multiple contacts or accounts at once, you can use the exclusion list upload feature:
Prepare a CSV file containing the company names and company domains you want to unenroll
Upload the file as exclusions in your sequence settings
The system will automatically unenroll all companies and prospects matching the uploaded list
This method is particularly useful when you need to remove many contacts from sequences simultaneously, such as when cleaning up lists or removing accounts that should no longer receive automated outreach.
Here's what the unenroll button looks like on a contact's profile:
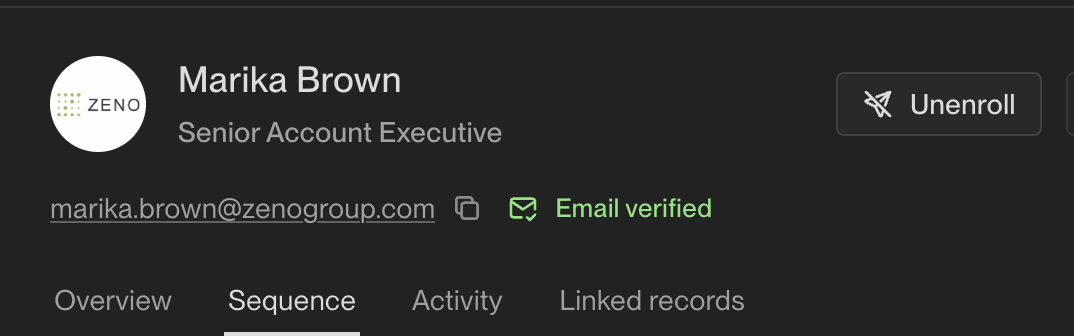
Note: This action will remove the contact from all active sequences they are currently enrolled in. When using the manual Unenroll button, this action will remove the contact from all active sequences they are currently enrolled in. This cannot be undone, and you would need to re-enroll the contact if you want to include them in future sequences.