Connecting Your Outlook Mailbox to Unify
Last updated: September 3, 2026
Overview
Unify connects directly to your Outlook mailbox via Microsoft's servers. Once connected, your sequences send from your real work address and replies sync back into Unify automatically.
What's supported
Unify supports Microsoft 365 and Exchange Online work and school accounts. Sequence emails send from your real work address, replies sync automatically and stop sequences, and sent emails appear in your Outlook Sent Items. You sign in once and your connection stays active.
Personal Outlook accounts (@outlook.com, @hotmail.com, @live.com) and shared mailboxes are not supported yet. Personal account support is coming soon.
How to connect
Go to Settings > Deliverability > Mailboxes
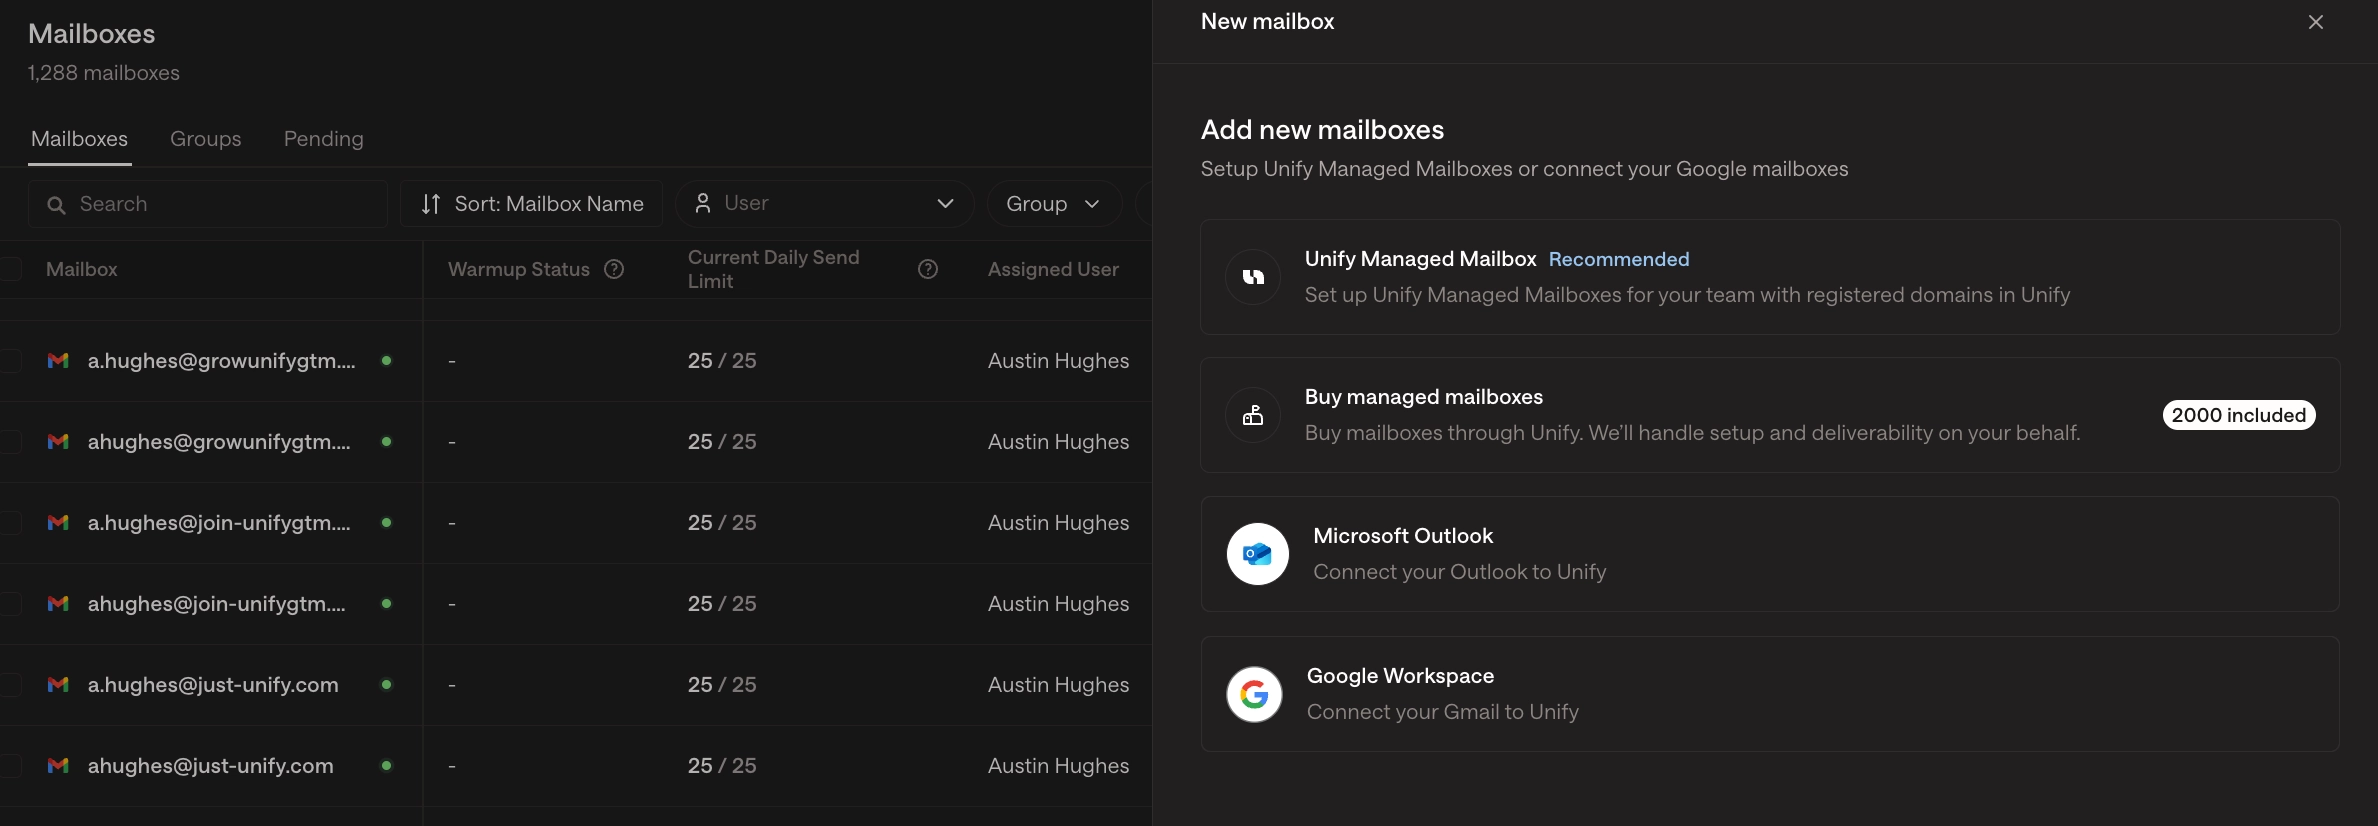
Click + Add mailbox and select Connect Microsoft Outlook
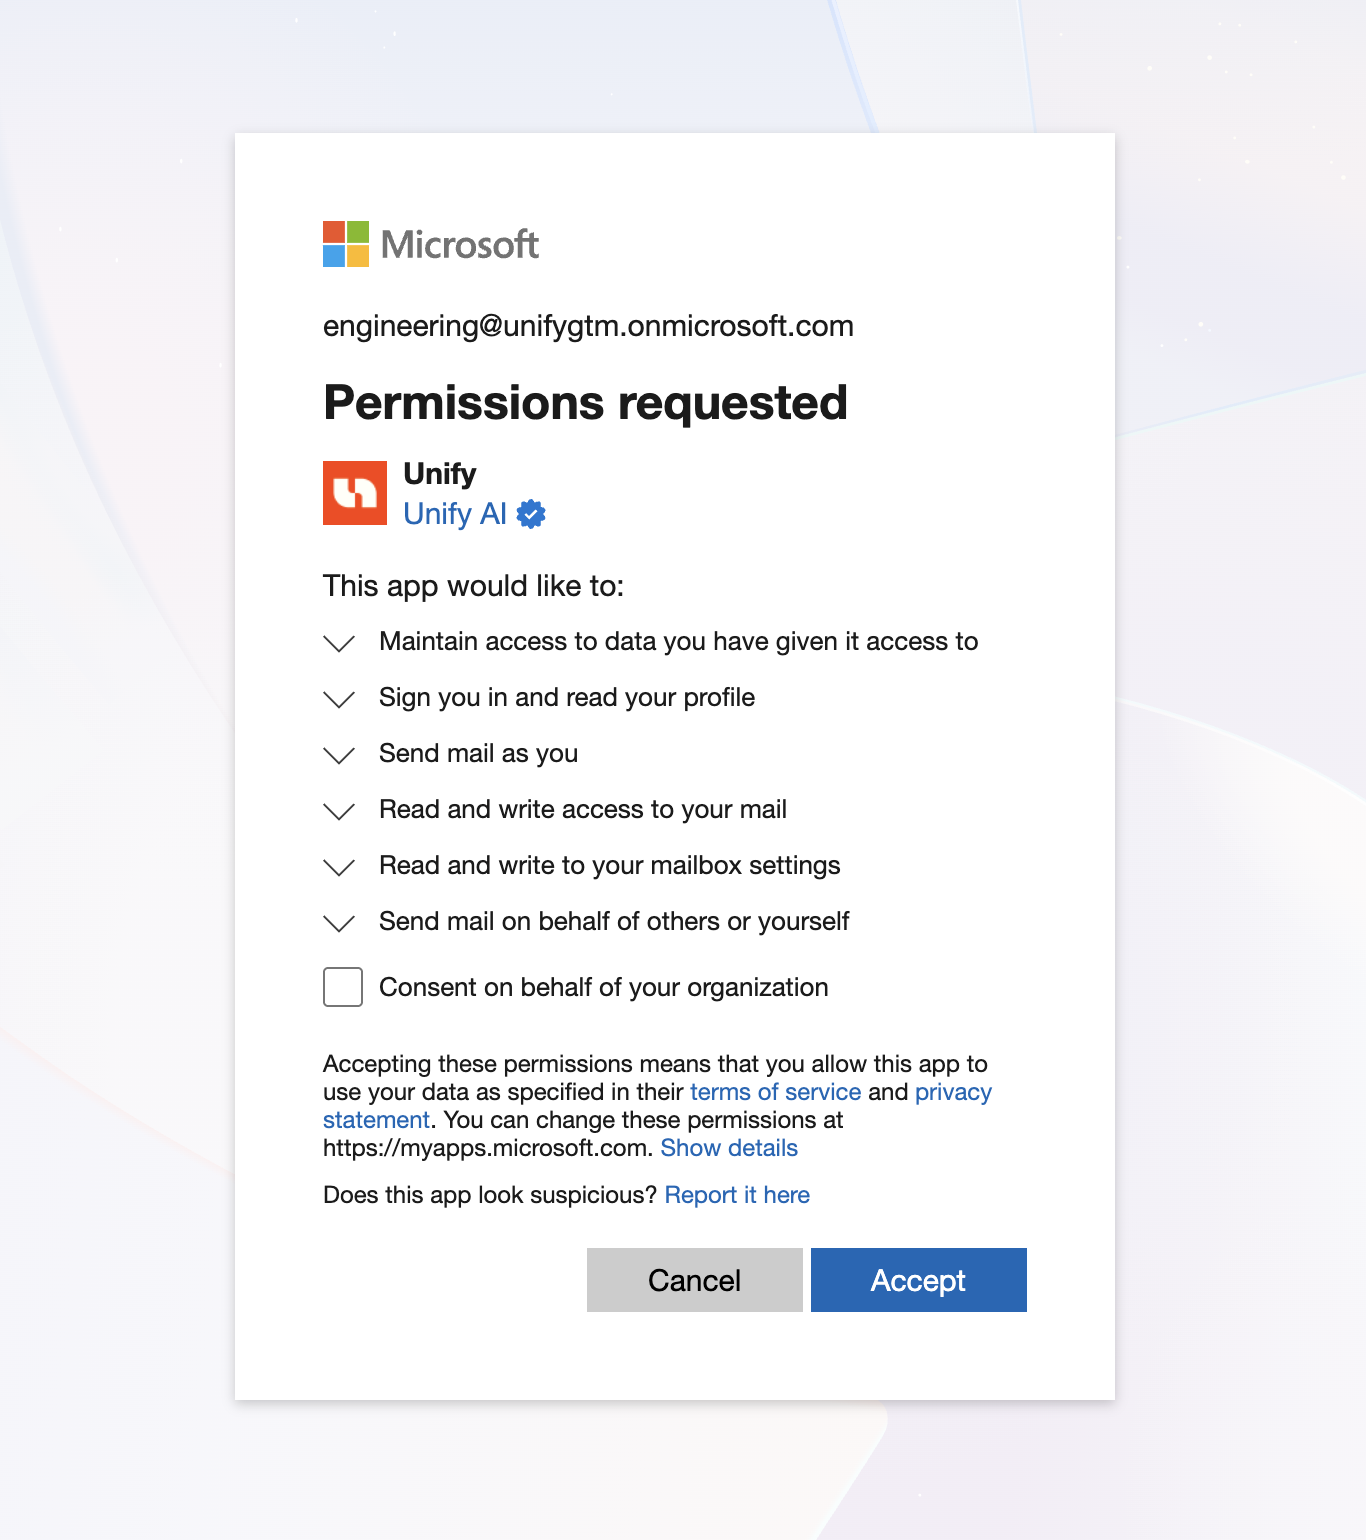
Sign in with your Microsoft 365 work account and approve the requested permissions
Your mailbox will appear in the list as connected
About the permissions Unify requests
When you connect your mailbox, Unify requests delegated permissions only. This means Unify can access your individual mailbox and nothing else. It does not have access to other mailboxes in your organization, and each person must sign in and consent individually. Unify requests six permissions:
Mail.Sendto send sequence emails from your address,Mail.ReadWriteto sync inbound replies and detect sequence responses,offline_accessto maintain the connection without requiring you to re-authenticate,User.Readto identify which Microsoft account you connected,Mail.Send.Sharedto send sequence emails from your address; and,MailboxSettings.Readwriteto read your mailbox settings like timezone so emails send at the right times.
Admin consent (IT admins only)
Some Microsoft 365 tenants require an admin to approve third-party apps before individual users can connect. If you see a "Need admin approval" screen when connecting your mailbox, your IT admin needs to grant consent for Unify in your Microsoft tenant before anyone in your organization can proceed.
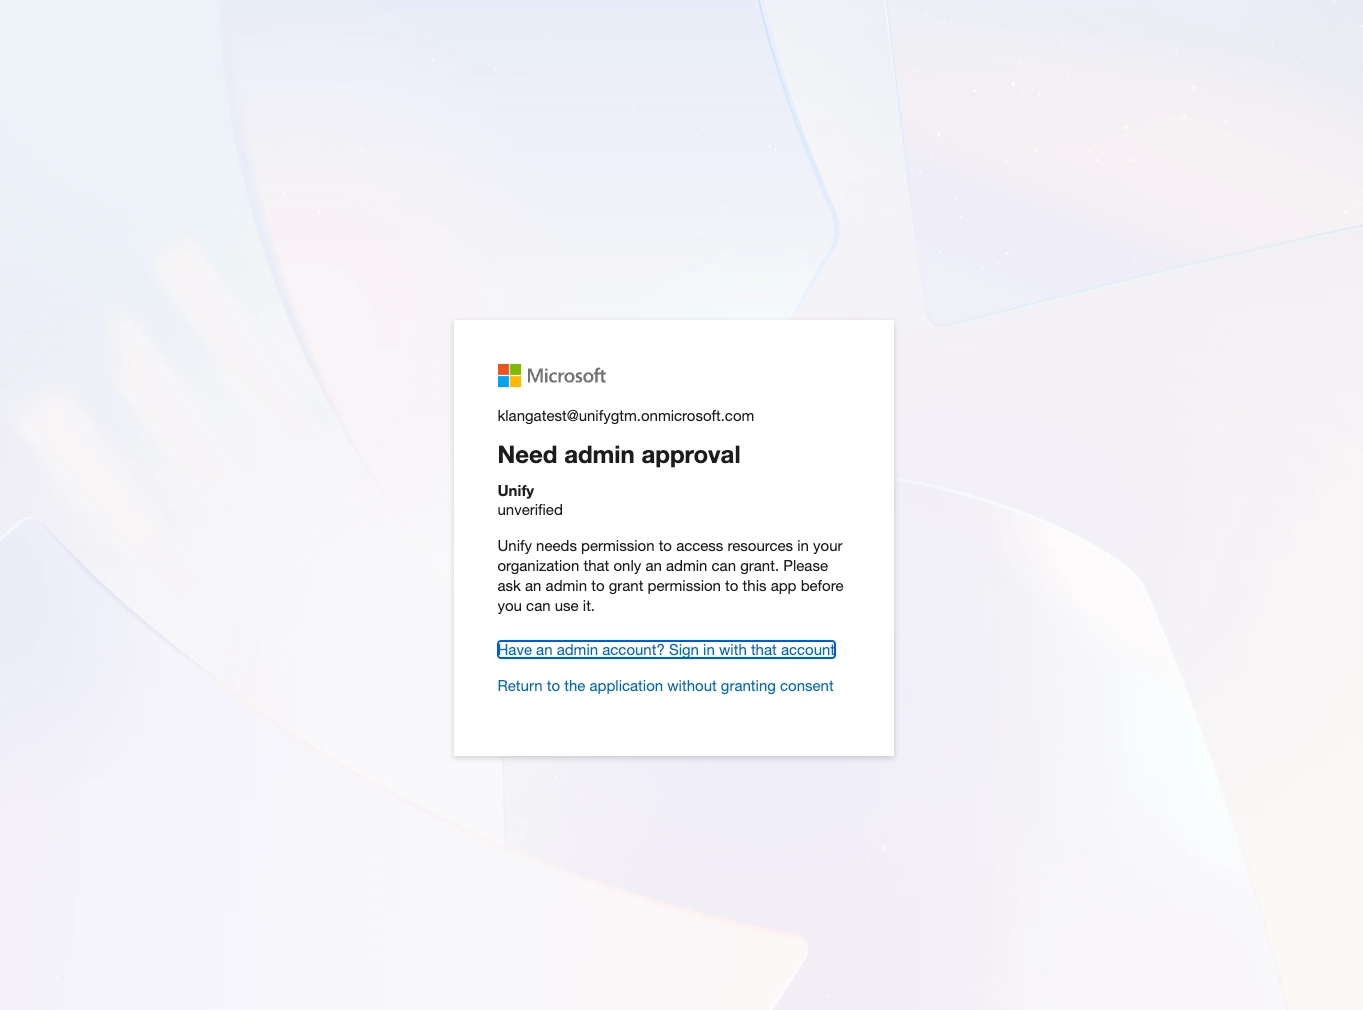
Option 1: Grant consent from the connection screen (recommended)
If you are a Microsoft Entra admin, you can grant consent for your whole organization directly when connecting your own mailbox. Check "Consent on behalf of your organization" before clicking Accept. This covers all users in your tenant immediately.
Option 2: Grant consent from the Entra admin center
Sign in to the Microsoft Entra admin center with a Global Administrator or Privileged Role Administrator account
Go to Enterprise applications, search for Unify, and open it
Note: Unify only appears here after at least one user has attempted to connect
Go to Permissions and click Grant admin consent for [your organization]
Review the permissions and click Accept
Once an admin has granted consent, all users in the tenant can connect their mailboxes without seeing the approval screen. If you are not sure who your IT admin is, contact your internal IT team.
Troubleshooting
Issue | What to do |
|---|---|
"Need admin approval" screen | Ask your IT admin to grant tenant-wide consent (see above) |
Mailbox shows as disconnected after connecting | Try reconnecting by going through the connection flow. If the error persists, contact Unify support |
Sequences still sending after a reply | Check that your mailbox is connected and showing as active in Settings |
Wrong account connected | Disconnect and reconnect, making sure to select the right account in the Microsoft sign-in screen |
Mailbox shows as unauthorized after a password change | Your credentials were revoked when you changed your Microsoft password. Go to Settings > Mailboxes and reconnect your mailbox to restore access. |