How Disabling Audience-Level Exclusions Affects Sequence Enrollments
Last updated: May 5, 2026
Context
When setting up sequences and plays to enroll contacts, it's important to understand how exclusions work and their impact on sequence enrollments. Exclusions can be applied at both the audience and sequence level, which affects who receives your emails.
Answer
There are two important aspects to understand about exclusions:
Audience vs Sequence Exclusions
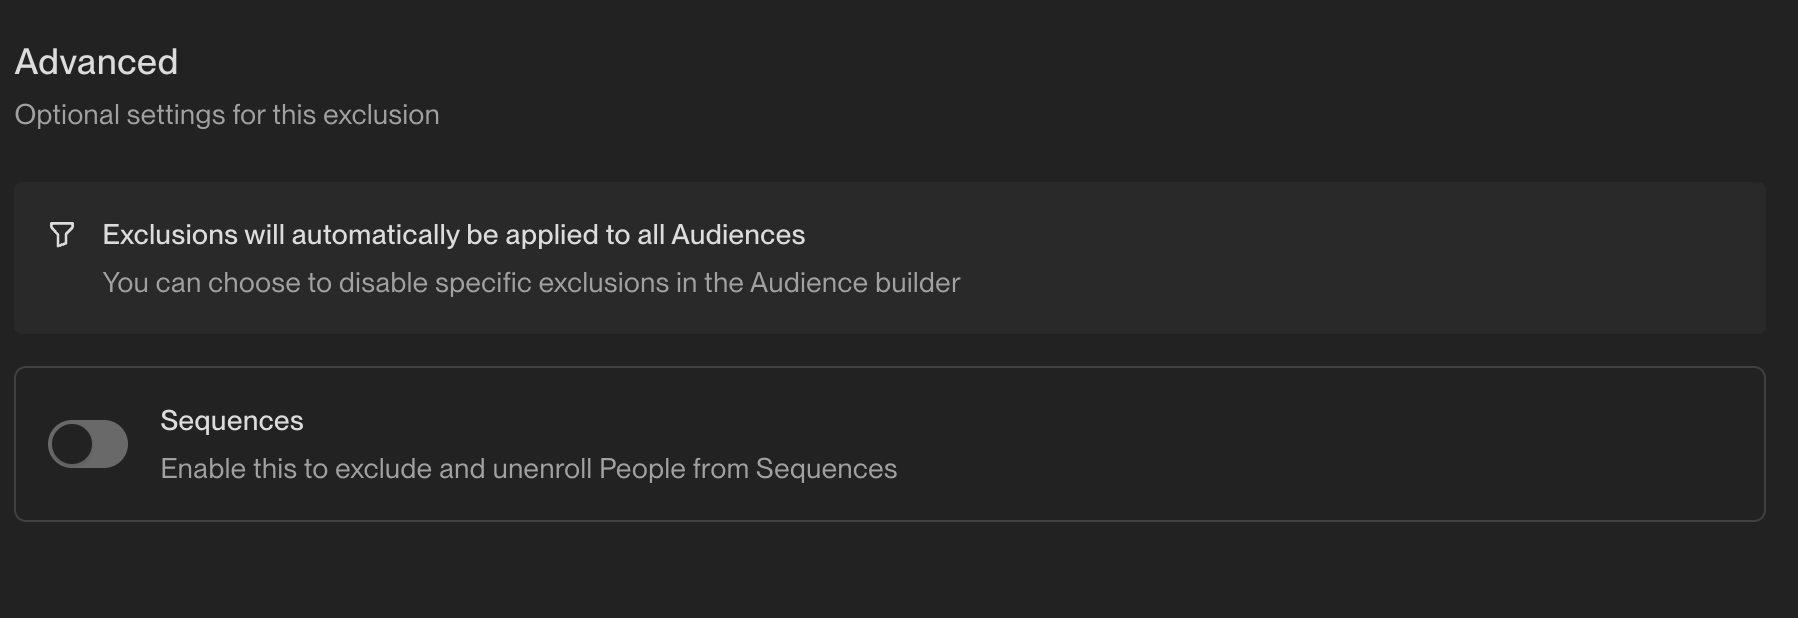
When you disable exclusions for an audience, this only affects who can be added to the audience, but will not be applied at the Sequence level. At the audience level, exclusions pre-filter the entry population before contacts enter the Play. At the sequence/play level, exclusions allow you to include certain contacts that you might not want to send emails to but want to include in the sequence for other reasons (such as tracking or reporting).
Sequence-level exclusions are global and will still apply to Sequence enrollments even if audience exclusions are disabled
You can control whether an exclusion applies to sequences by toggling the "Exclude from Sequences" setting in the exclusion configuration
When creating new audiences, some exclusions (such as Internal Employees) may be enabled by default. Always verify which exclusions are active in your audience configuration to avoid unexpectedly filtering out contacts.
When a play uses an audience as its trigger, the exclusion toggles in the play editor are disabled. To change which exclusions apply, edit the audience configuration directly and adjust the exclusions there.
Managing Sequence Exclusions
To check or modify whether an exclusion applies to sequences:
Go to Settings > Organization > Exclusions
Find the relevant exclusion
Look for the "Exclude from Sequences" toggle
Dual‑Toggle Verification: In addition to the organization‑level toggle, also confirm the exclusion is enabled in the Ruleset settings (Settings > Organization > Sequences > Rulesets). Both toggles must be on for the exclusion to affect sequence enrollments.
Sequence‑level exclusions are applied globally to all enrollment methods – plays, manual adds, Chrome extension, API, etc. Enabling “Exclude from Sequences” means the rule is enforced regardless of how contacts are added to a sequence.
Re-enrolling Previously Excluded Contacts
If you need to re‑enroll contacts that were previously excluded from sequences, follow this systematic approach:
Toggle off the "Exclude from Sequences" setting for the relevant exclusion rule in Settings > Organization > Exclusions
Wait approximately 30 minutes for the changes to propagate across the system
Duplicate and re‑run the play with the same audience (rather than just re‑running the existing play)
Enable "allow re‑enrollment into the same sequence" in your sequence settings if needed
Important: Re‑enrolled contacts resume at their next step in the sequence, not from the beginning. If you need contacts to start from the first step, you must create and enroll them in a new sequence.
Reassigning Outboxes for Active Enrollments
If you need to change the outbox for contacts already enrolled in a sequence (for example, to bypass rate limiters or redistribute email load), you can reassign enrollments without re‑enrolling contacts:
Navigate to Email Backlog
Scroll to Reassign Sequence enrollments
Click Reassign Enrollments for your target sequence
Select the new mailbox(es) you want to use
Save your changes
Important limitation: This reassignment only works for queued enrollments that haven't been sent yet. Emails already sent or in progress cannot be reassigned to a different outbox.
If you need to change outboxes and re‑enroll contacts from the beginning of a sequence, follow the re‑enrollment procedure described in the previous section, ensuring you've set the re‑enrollment waiting period to 0 days and duplicated the sequence with the new outbox configuration.
Admin Permission Requirements for Sequence Ruleset Modifications
Important: Admin permissions are required to modify ruleset settings in Settings > Organization > Sequences > Rulesets. If you cannot access or modify these settings, contact your Unify administrator to make the necessary changes.
This permission requirement is often overlooked when troubleshooting re‑enrollment issues, as users may assume they have the necessary access to modify these critical settings.
Identifying Permission-Related Re‑enrollment Blocks
If contacts are still not re‑enrolling after following standard troubleshooting steps:
Verify you can actually access and modify the ruleset settings (not just view them)
If the settings appear grayed out or you cannot save changes, this indicates insufficient permissions
Contact your Unify administrator to either grant you admin access or make the ruleset modifications on your behalf
Confirm both the waiting period and “allow re‑enrollment into the same sequence” toggle have been properly configured by an admin user
Common Exclusion Use Cases
Excluding Sales Reps:
Option A (Individual reps): Create a People exclusion and manually add their email addresses
Option B (Bulk upload): Upload a CSV file with rep emails and a "Status" column (e.g., "Sales Rep"), then create a People exclusion filtering on
Status equals Sales Rep
Excluding Non-Target Companies:
Go to Settings > Exclusions > New exclusion
Select Companies and add a domain rule using "Domain contains one of"
List the company domains you want to exclude (e.g., international companies or non-sales‑opportunity accounts). Enter multiple domains in the same field separated by commas (e.g.,
competitor1.com, competitor2.com, competitor3.io). You don't need to includehttp://orwww– just the root domains work best.Note: Company domains will only appear in the exclusion interface dropdown if they already exist in your CRM or have been deanonymized via web intent. If a domain doesn't appear when you're setting up the exclusion, you can still add it manually, and the exclusion will take effect once those companies are added to your CRM or appear via web intent.
Company exclusions automatically apply to all contacts at those companies
You can also create permanent exceptions within an exclusion rule by adding “AND” conditions with “is not equal to” operators. This lets you keep a global exclusion while exempting specific contacts or companies.
Company‑level exclusion: Add an “AND” condition with
domainis not equal toexample.comto exempt that domain.Contact‑level exclusion: Add an “AND” condition with
emailis not equal touser@example.comto exempt that contact.
Note: After creating or updating exclusions, wait 30 minutes for changes to propagate before re-running plays.
You can use exclusions to bulk unenroll contacts from sequences. Upload a list of companies (with company name and company domain) as exclusions, and all associated prospects will be automatically unenrolled from active sequences. This is particularly useful when you need to remove multiple accounts from sequences at once.
Important: If you're using CRM integrations where Unify writes back email activity, be aware that this activity logging may trigger updates to fields like "last activity date" in your CRM, even if those fields are set to "read only" in Unify. If you have exclusions based on recent activity dates, this could cause contacts to be unexpectedly excluded from sequences after receiving Unify outreach. In such cases, consider toggling off "Exclude from Sequences" for activity-based exclusions to prevent this issue.
CRM Sync Requirements for Exclusions
You can also view which exclusions apply in additional locations:
At the Play level: Play editor → click into the trigger node and scroll to the bottom.
At the Audience level: Edit → Advanced (scroll to bottom).
Important limitation: CRM-based exclusions (such as those using last activity date from Salesforce) will only work for contacts that are properly synced to your CRM. If a contact is not synced due to duplicate records, validation errors, or other sync issues, the exclusion will not have access to the CRM data needed to evaluate the exclusion criteria. This can result in contacts being enrolled in sequences when they should be excluded.
If you notice exclusions not working as expected, check that the affected contacts are properly synced to your CRM and resolve any duplicate records or sync errors.
Duplicate CRM Records and Audience Qualification
While exclusions are often the first suspect when contacts don’t enroll in sequences, duplicate CRM records can prevent contacts from qualifying for audiences in the first place—before exclusions are even evaluated.
When a contact has duplicate records in your CRM, Unify may evaluate the wrong record during audience qualification. If the duplicate record lacks required field values (such as “Most Recent Conversion,” lead source, or other audience filter criteria), the contact will fail to meet the audience qualification criteria before exclusions are even checked.
Key diagnostic insight: If a contact isn’t appearing in your audience despite having the expected field values in what you believe is their “main” record, check for duplicates. Unify may be evaluating a different record that lacks the complete field data.
Targeted Troubleshooting for Audience Qualification Issues
When contacts don’t appear in audiences (before exclusions are applied):
Search for the contact in your CRM to identify all duplicate records
Compare field values across all duplicates—look for missing data in secondary records
Merge duplicates in your CRM, ensuring the surviving record contains all necessary field data
Wait 15 minutes for CRM sync, then re‑test audience qualification
Regularly audit and merge duplicate records in your CRM to ensure Unify consistently evaluates the complete, accurate record for each contact. This prevents both audience qualification issues and exclusion evaluation problems.
Troubleshooting CRM-Based Exclusion Failures
Verify contact sync status – Check if the contact exists in your CRM with the expected data.
Look for duplicate records – Multiple records for the same contact can prevent proper syncing.
Check for validation errors – CRM validation rules may be blocking the sync.
Review sync logs – Look for any error messages related to the specific contact.
This limitation is particularly important for exclusions based on recent activity dates, opportunity creation, or other CRM-specific fields that require the contact to be fully synced to function properly.
Dynamic Exclusion Checking During Sequences
When the "Exclude from Sequences" toggle is enabled for an exclusion rule, the system continuously monitors contacts throughout their sequence enrollment. If a contact meets the exclusion criteria at any point during an active sequence, they will be automatically unenrolled from that sequence.
Key points about dynamic exclusion checking:
Exclusions are evaluated regularly throughout sequence execution, not just at enrollment
CRM-based exclusions (such as opportunity creation) typically update every 15 minutes
Contacts can be automatically removed mid-sequence when exclusion conditions are met
This is particularly useful for scenarios like removing prospects from sequences when opportunities are created against their accounts, even if the opportunity is created after the sequence has already started.
Multi-CRM Opportunity Evaluation
When multiple CRMs are integrated, opportunity‑based exclusions evaluate records from all connected systems simultaneously. A contact may be eligible in one CRM but still be excluded because another CRM has an active opportunity.
Check all integrated CRM systems when troubleshooting opportunity‑based exclusions.
View all active opportunities on the account record in Unify by scrolling down.
Remember that exclusions consider combined data from all connected CRMs, not just the primary one.
List Upload Exclusion Behavior
When uploading lists directly, exclusions do not filter the list itself but are applied during sequence enrollment when the play trigger processes contacts.
Uploaded lists show all contacts regardless of exclusion rules.
Exclusions are evaluated when the play trigger attempts to enroll contacts into sequences.
Contacts may appear in the audience but still fail to enroll due to sequence‑level exclusions.
Additional Operational Considerations for Sequence Exclusions
Critical Timing for Exclusion Settings
Important operational consideration: If you temporarily disable the “Exclude from Sequences” setting to allow certain contacts to enroll in a sequence, you must keep this setting disabled throughout the entire sequence execution, not just during enrollment. Re‑enabling sequence exclusions while contacts are mid‑sequence will cause them to be automatically unenrolled if they meet the exclusion criteria.
After toggling the “Exclude from Sequences” setting off, wait 30 minutes before re-running your play to ensure the changes take effect.
Note: After creating or updating exclusions, wait 30 minutes for changes to propagate before re‑running plays.
Beyond the standard exclusions, several other factors can prevent sequence enrollment:
Play qualification statuses and sequence enrollment
Marking a contact as “Not qualified” (or any other status) within a play does NOT automatically unenroll them from sequences.
Unenrollment only occurs through manual action or when an exclusion rule with “Exclude from Sequences” enabled is triggered.
If you want contacts marked as “Not qualified” to stop receiving sequence emails, you must either add an explicit unenroll action in that branch of your play or ensure they meet an active exclusion rule.
Paused Sequences Block New Enrollments: Contacts remain enrolled in sequences even when those sequences are paused. Pausing a sequence will not resolve enrollment conflicts – contacts must be manually removed from their current sequence to enroll in a new one.
Re‑enrollment Waiting Periods: Contacts must wait a specified number of days between sequence enrollments. You can adjust this waiting period at Settings ▶ Organization ▶ Sequences ▶ Rulesets. To immediately re‑enroll contacts, temporarily set this to 0 days, wait 30 minutes, then duplicate and re‑publish your play. After enrollments complete, restore the previous setting.
Preventing Routing Rule Failures: When contacts have titles that don’t match any defined persona in your routing rules, they cannot be enrolled. To prevent this, configure an “everyone else” routing option in your sequence node to ensure all contacts are routed to a mailbox/sequence even when their title doesn’t match a specific persona.
Future Exclusion Controls
Currently, exclusions cannot be enabled/disabled at the individual sequence level – they are either applied globally to all sequences or none. However, sequence‑level exclusion controls are planned for a future release.
Troubleshooting Sequence Enrollment Issues: Identifying Specific Exclusions
Here are actionable troubleshooting steps:
Check the sequence's Enrollments tab for detailed failure reasons:
Navigate to the sequence where you expected contacts to enroll
Check if any exclusions are enabled by default in your audience or play configuration, as these may be filtering contacts before they reach the enrollment stage.
Click on the Enrollments tab
Review the Not Enrolled breakdown to see per‑contact failure reasons and which specific rule or limit blocked each contact
Review the Unenrolled breakdown to see contacts who were initially enrolled but later removed due to exclusions being met mid‑sequence.
Note: After bulk enrollments, allow 30‑60 minutes for enrollment counters to fully update during eligibility checks
View exclusions directly on a contact record:
Navigate to Contacts and search for the person by email
Click on their contact record
Select the "Exclusions" tab to see which exclusion rules apply to this contact
Toggle exclusions within a play to identify affected contacts:
Navigate to the Play that's enrolling contacts into sequences
In the play interface, toggle individual exclusions off/on
Observe how the eligible contact count changes with each toggle to identify which exclusions are filtering out contacts
This method is particularly useful for understanding enrollment drop‑offs when working with uploaded lists or specific audiences
Real‑world troubleshooting workflow:
Navigate to the Play → Logs tab to see which contacts were not enrolled
Click on individual contacts who failed to enroll
Go to their Exclusions tab to see which specific exclusion rules apply
Cross‑reference these exclusions with your Settings → Organization → Exclusions to understand the criteria
Check Play Metrics, Execution Logs, and Contact Activity (for Play-based enrollments):
For Play-based enrollments:
Open the Play and go to the Logs tab to view detailed run history including contacts that were not enrolled and specific failure reasons
Navigate to the contact's profile in Unify and click the Activity tab to see the Play run with enrollment status. If excluded due to re‑enrollment rules, the status will show "not enrolled" with a failure reason (e.g., "already enrolled" or "recently enrolled")
For manual enrollments:
Open the contact's record → Activity tab and check the Play/Sequence entries for the enrollment attempt and reason
Important limitation: Exclusion information is NOT displayed in the activity log for manual enrollments. You must use the contact's Exclusions tab (described above) to identify which exclusions are blocking enrollment
Test exclusions for a specific contact:
Create a test audience based on the contact's email address
Toggle individual exclusions off/on in Settings > Organization > Exclusions
Observe which exclusion prevents the contact from appearing in the audience
Important: If you recently modified exclusion settings, allow 15-30 minutes for changes to propagate before re‑testing enrollment. Additionally, verify both the Play‑level re‑run settings (which control whether contacts can trigger the Play multiple times) and the sequence re‑enrollment rules (which control whether contacts can be added to sequences again), as these are separate settings that both affect enrollment.
Manual Unenrollment Methods for Active Sequence Contacts
While the system automatically unenrolls contacts through exclusion rules, you may need to manually remove contacts from sequences for operational reasons.
To unenroll a single contact:
Navigate to Contacts and search for the person by email
Open the contact's profile
Click Unenroll to immediately cancel all remaining sequence steps for that contact
To bulk unenroll multiple contacts:
Go to Sequences → Enrollments
Filter or select the contacts you want to remove
Click Unenroll to process the batch unenrollment
Note: Bulk unenrollment runs in batches and typically completes shortly after you trigger it.
This manual approach is useful when you need immediate unenrollment without setting up exclusion rules, or when dealing with one‑off situations that don't warrant creating permanent exclusions.
Common Sequence Enrollment Limitations Not Related to Exclusions
Several factors that can also limit sequence enrollment include:
Maximum contacts per company limit

Already enrolled in another sequence

Missing routing rules for specific personas

Note: Currently, exclusions cannot be enabled/disabled at the individual sequence level. They are either applied globally to all sequences or none.
Preventing Exclusion Timing Issues and Strategic Bypassing of Global Exclusions
Timing Issues with Exclusions
Exclusions may not take effect before the first email is sent in a sequence, causing contacts to be excluded mid‑sequence instead of at enrollment. This timing problem can occur due to caching delays with person‑level exclusions and CRM sync timing.
Preventing Mid‑Sequence Exclusions Due to Timing Issues:
Use company‑level exclusions (e.g., domain‑based) instead of person‑level exclusions when possible, as person‑level exclusions may have caching delays that cause the first email to be sent before the exclusion check completes.
Allow sufficient time for sync processes before running plays: CRM field updates take approximately 15 minutes to sync, and exclusion toggle changes take approximately 30 minutes to take effect.
Test exclusion timing by waiting for the appropriate sync window after making exclusion changes before enrolling contacts in sequences.
Strategic Bypassing of Global Exclusions for Targeted Campaigns
While exclusions with “Exclude from Sequences” enabled apply globally by default, you can bypass them at the audience level for specific plays. When creating an audience, you can toggle off specific exclusions to allow those contacts to be enrolled in sequences associated with that play, even if they would normally be excluded globally.
Leveraging intent data for existing deals in targeted nurture plays.
Running specialized campaigns to previously excluded segments.
Testing new approaches with contacts who would normally be filtered out.