How do I create effective company and contact exclusions in Unify?
Last updated: May 5, 2026
Context
When setting up sequences and plays to enroll contacts, it's important to understand how exclusions work and their impact on sequence enrollments. Exclusions can be applied at both the audience and sequence level, which affects who receives your emails.
Answer
There are two important aspects to understand about exclusions:
Audience vs Sequence Exclusions
Exclusions are global by default - when you disable exclusions for an audience, this only affects who can be added to the audience, but will not be applied at the Sequence level
Company-level exclusions automatically apply to all contacts within those companies - you don't need to create separate contact-level exclusions for individuals within excluded companies
Sequence-level exclusions are global and will still apply to Sequence enrollments even if audience exclusions are disabled
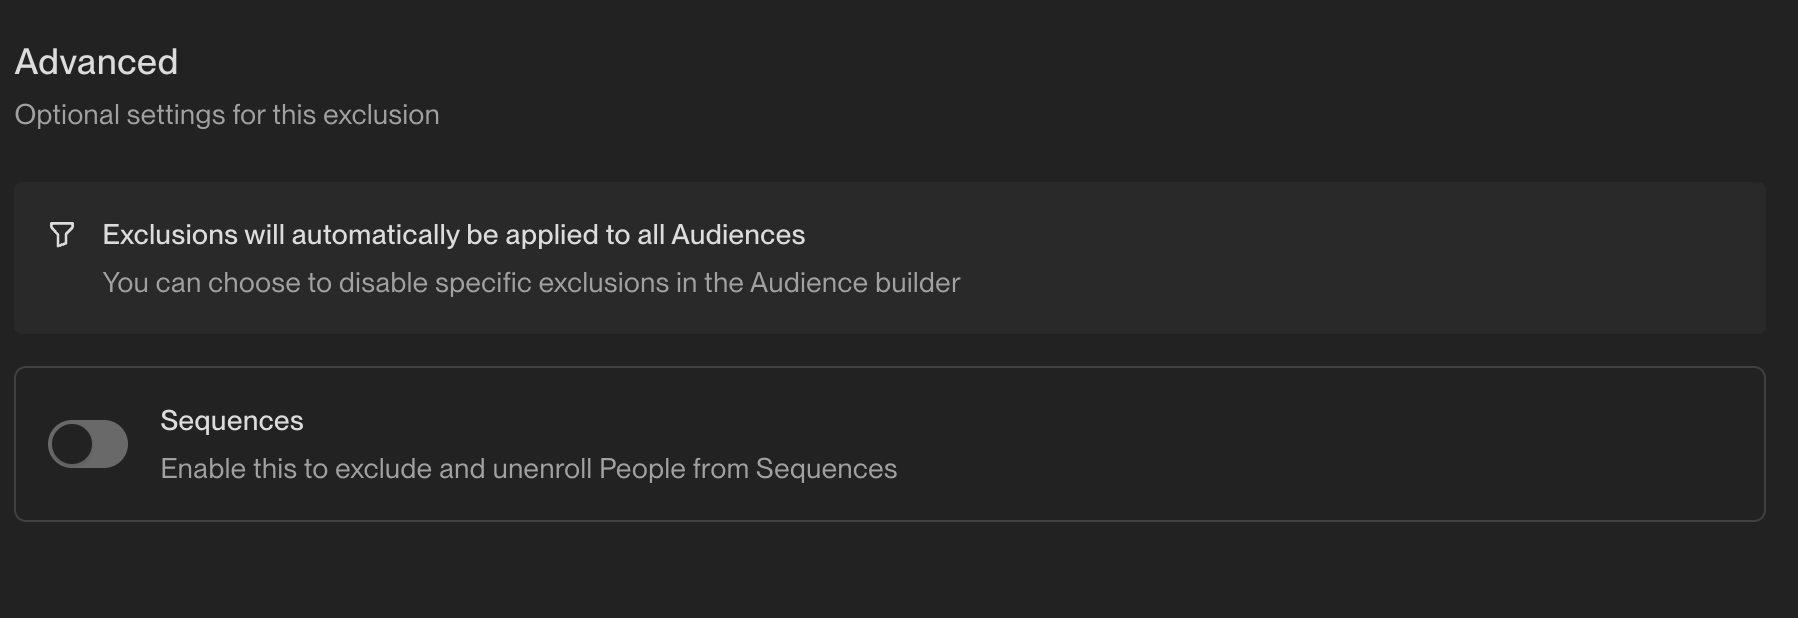
You can control whether an exclusion applies to sequences by toggling the "Exclude from Sequences" setting in the exclusion configuration
Universal Exclusion Hierarchy and Audience-Level Overrides
Universal exclusions are applied by default to all audiences, but can be toggled off at the audience level when creating or editing specific audiences.
Audience-level exclusion settings can override universal exclusions – if you disable a universal exclusion for a specific audience, contacts from that audience may still be enrolled even if they meet the universal exclusion criteria.
Sequence-level exclusions always take precedence over audience-level settings – even if exclusions are disabled at the audience level, global sequence-level exclusions will still apply to prevent enrollment.
Key takeaway: If contacts are unexpectedly enrolling despite having universal exclusions set up, check whether those exclusions have been disabled at the audience level. Sequence-level exclusions provide the most reliable protection against unwanted enrollments.
Managing Sequence Exclusions
To check or modify whether an exclusion applies to sequences:
Go to Settings > Organization > Exclusions
Find the relevant exclusion
Look for the "Exclude from Sequences" toggle
Unenrolling Contacts from Sequences
If you need to remove contacts from a sequence (for example, if they were enrolled by mistake), you can unenroll them individually or in bulk:
Go to the Sequences tab and open the relevant sequence
Click the Enrollments tab
Use search and filters (such as persona, company, or other shared traits) to find the contacts you want to unenroll
Select the contacts you want to remove
Click Unenroll at the bottom‑right to remove them from the sequence
This is particularly useful when a play condition was too broad and enrolled contacts that don’t match your intended ICP.
Common Exclusion Use Cases
Excluding Sales Reps:
Option A (Individual reps): Create a People exclusion and manually add their email addresses
Option B (Bulk exclusion): Upload a CSV file containing rep emails with a "Status" column (e.g., "Sales Rep"), then create a People exclusion filtering on
Status equals Sales RepOption C (Title‑based): In Personas settings, exclude words like "sales" in the titles section to prevent enrollment at the persona level
Excluding International Companies:
Create a Company exclusion using domain rules
Select "Domain contains one of" and list the company domains you want to exclude
This automatically applies to all contacts at those companies
Note: Company exclusions automatically apply to all contacts at those companies. Allow time for updates to propagate after creating or updating exclusions.
Important: If you're using CRM integrations where Unify writes back email activity, be aware that this activity logging may trigger updates to fields like "last activity date" in your CRM, even if those fields are set to "read only" in Unify. If you have exclusions based on recent activity dates, this could cause contacts to be unexpectedly excluded from sequences after receiving Unify outreach. In such cases, consider toggling off "Exclude from Sequences" for activity‑based exclusions to prevent this issue. Note that this limitation can cause contacts to be excluded from the same play that sent the email, since exclusions are evaluated continuously during sequence execution.
Critical CRM Opt-out Field Mapping for Compliance
When a contact opts out via Unify, the status writes back to your CRM only if the “Do Not Email” field mapping is set to “read & write”. If it’s “read only”, the sync is one‑way, creating compliance gaps.
To verify and update the setting:
Navigate to Settings > Integrations > [Your CRM] > Field Mappings
Locate the “Do Not Email” or opt‑out field configuration
Ensure it’s set to “read & write” for full bidirectional sync
This ensures opted‑out contacts are protected in both systems and prevents accidental re‑enrollment.
Creating Company Exclusions
Navigate to Settings > Organization > Exclusions
Create a new exclusion and select “Companies” as the exclusion type
Critical Warning: If you change an exclusion's type after creation (e.g., from “Companies” to “People” or vice versa), all existing filter criteria will be reset. This can cause unintended mass exclusions if you don't immediately reconfigure the filters. For example, toggling from company to person exclusion may result in criteria like “email is not equal to [specific email]”, which would match and exclude everyone except that one person. If this exclusion is enabled for sequences, it will immediately unenroll all affected contacts. Always create a new exclusion instead of changing the type of an existing one.
Add a domain filter using “contains one of” and input the company's domain
When entering multiple domains in the same exclusion rule, separate them with commas in a single field (e.g.,
competitor1.com, competitor2.com, competitor3.io). You don’t need to create separate fields for each domain or includehttp://orwww.prefixes—just the root domains.Enable the proactive unenrollment setting to automatically remove contacts from existing sequences that match the exclusion criteria
Toggle on “Exclude from Sequences” if you want this exclusion to apply to sequence enrollments
Advanced Exclusion Rule Modification for Targeted Exceptions
When you need to create exceptions for specific contacts or companies within an existing exclusion rule, modify the rule logic instead of disabling the whole rule.
Creating Targeted Exceptions Within Exclusion Rules
Navigate to Settings → Organization → Exclusions
Click on the exclusion you want to modify to open it
Edit the filter criteria as needed
Save your changes
Using AND logic for exceptions:
For company‑level exclusions, append AND domain is not equal to [specific domain] to exempt a particular company while keeping the broader exclusion active.
For contact‑level exclusions, append AND email is not equal to [specific email] to create an individual exception.
Chain multiple “is not equal to” conditions with AND to exempt several contacts or domains from the same rule.
Using OR logic for broader matching:
Click “Add Group” to create a new filter group.
Set the group logic to OR to match contacts that meet any of the conditions in either group.
This allows you to create more complex exclusion patterns that match multiple different criteria sets.
This approach retains protection for all other contacts and avoids the risks of temporarily disabling entire exclusion rules.
Creating Exceptions to Company‑Level Exclusions for Role‑Based Targeting
If you need to enroll specific contacts while maintaining company‑level exclusions for the rest of the organization, consider the following options:
Option A: People‑level exception using target lists or filters
Keep the company‑level exclusions enabled.
Create a people‑level exception using a target list or audience filter that selects the desired roles (e.g., “Job Title contains ‘Group’ OR ‘Division’”).
Option B: CRM field‑based targeting
Mark eligible contacts in your CRM with a custom field such as “Expansion Target” = “Group Level Contact”.
Base your sequence audience criteria on that field rather than disabling the company exclusion.
These methods let you reach decision‑makers at the group or division level without opening the broader company exclusion to all contacts.
After implementing the exclusion, verify its effectiveness by:
Checking your CRM to confirm contact statuses have been updated
Reviewing active sequence reports to ensure the company no longer appears in active sequences
Note: If you're using a CRM like HubSpot or Salesforce, you can also opt out the company in your CRM and configure field mapping in Unify to sync opt‑out fields for global exclusion coverage.
Advanced Company Exclusion Implementation: CSV Methods and Role-Based Strategies
CSV-Based Company Exclusions: Three Strategic Approaches
These methods let you bulk‑manage company exclusions using CSV files or CRM integrations, covering one‑time, ongoing, and field‑based scenarios.
Strategic Company-Wide Qualification Exclusions
If you want to prevent sequencing all contacts from a company when one contact is being qualified (e.g., has booked a call or is marked as MQL), avoid using contact‑level fields like lifecycle stage or lead status, as these only exclude the individual contact.
Instead, create a company‑level field (such as “Qualification Status” = “Being Qualified”) that gets updated when any contact from that company enters qualification, then base your exclusion on this company‑level field to exclude all contacts from that company.
For maximum reliability, implement this as a sequence‑level exclusion rather than relying on universal or audience‑level settings.
Method 1: Direct CSV Upload in Exclusions Interface
Best for: One‑time exclusions of competitors or educational institutions, or large lists of contacts/companies that don’t share a common field value
Navigate to Settings > Organization > Exclusions
Click “New Exclusion” and select “Companies”
Choose “Company Name” and “contains one of”
Use the CSV upload option to bulk import company names (one per line)
Optionally map a “status” column to Unify’s status field and create filters based on those status values
Method 2: CRM List Integration
Best for: Ongoing management when you’ll add more companies to the same exclusion categories
Create a dedicated list in your CRM (e.g., “Competitor Companies”)
In Unify exclusions, reference this CRM list
Add/remove companies directly in your CRM – changes sync automatically
Best practice: schedule a weekly re‑import of the list to keep exclusions current
Method 3: Field‑Based Exclusions from Uploaded Data
Best for: Creating exclusions based on custom fields or status values assigned during CSV import
Navigate to **People** or **Companies** (depending on what you’re excluding)
Upload your CSV file containing the records to exclude
During the CSV mapping process, map a column to a field like **Status** and set the value to “Exclude” for all rows
Go to Settings → Organization → Exclusions
Create a new exclusion rule based on your mapped field (e.g.,
status = exclude)Configure the “Exclude from Sequences” toggle as needed
Best Practice: For CRM‑based exclusions (such as open opportunities or customers), set up a regular cadence to re‑import updated lists — weekly is recommended. This keeps exclusions current and prevents outreach to newly created opportunities or customers.
Strategic Contact‑Level Exclusions for Role‑Based Targeting
Example: Excluding HR Personnel from Sales Sequences
Create a contact exclusion using “Job Title” contains “HR”, “Human Resources”, “People Operations”
This prevents sales sequences from targeting HR contacts while allowing other roles at the same companies
Example: Excluding C‑Level from SDR Sequences
Use job‑title exclusions for “CEO”, “CTO”, “CFO”, “Chief”
Route these contacts to AE sequences instead through separate audience criteria
Implementation Decision Framework
Choose Method 1 when you need a quick, static list of competitors or institutions without ongoing changes.
Choose Method 2 for dynamic, frequently‑changing exclusion categories that should stay in sync with your CRM.
Choose Method 3 when you require custom‑field or status‑driven exclusion logic.
Testing and Validation Framework
Create a test audience that includes a small sample of the companies or contacts you plan to exclude.
Run the audience and verify that excluded records appear in the “Excluded” tab.
Check both audience‑level and sequence‑level behavior to ensure exclusions are honoured throughout the enrollment flow.
Confirm CSV formatting and field mapping are correct before scaling up.
After full deployment, periodically re‑run the test audience to catch any regressions.
Advanced Exclusion Timing Strategies and Pre‑Send Validation
Pre‑Send Exclusion Validation for Critical Campaigns
Run your audience 24‑48 hours before the scheduled send to allow multiple CRM sync cycles.
Export the final audience list and cross‑reference against your CRM's exclusion lists manually.
This is particularly important for executive outreach or partner communications where exclusion failures have high consequences.
Person‑Level Exclusion Caching Considerations
This is most problematic for contacts added to your CRM within the same day as sequence enrollment.
For same‑day imports followed by immediate outreach, manually verify exclusion status before enrollment.
Consider implementing a 24‑hour delay between contact import and sequence enrollment for critical exclusion categories.
Strategic Exclusion Architecture for Complex Go‑to‑Market Teams
Base Layer: Global exclusions for compliance and brand protection (competitors, opted‑out contacts).
Team Layer: Role‑specific exclusions managed at the audience level (e.g., SDRs exclude enterprise accounts, AEs exclude SMB accounts).
Campaign Layer: Tactical exclusion overrides for specific plays (e.g., including open opportunity contacts in multithreading campaigns).
This architecture ensures exclusions serve strategic purposes rather than becoming blanket restrictions that limit targeted outreach opportunities.
Dynamic Exclusion Checking During Sequences
When the "Exclude from Sequences" toggle is enabled for an exclusion rule, the system continuously monitors contacts throughout their sequence enrollment. If a contact meets the exclusion criteria at any point during an active sequence, they will be automatically unenrolled from that sequence.
Key points about dynamic exclusion checking:
Exclusions are evaluated regularly throughout sequence execution, not just at enrollment
CRM-based exclusions (such as opportunity creation) typically update every 15 minutes
Contacts can be automatically removed mid-sequence when exclusion conditions are met
Re‑enrollment after exclusion removal:
If a contact is removed from an exclusion list (no longer meets exclusion criteria), they can be enrolled in sequences again
Re‑enrollment will occur if the contact meets audience criteria and enters an audience that is actively enrolling into a sequence
This allows for flexible management of exclusions as business conditions change
Best Practice for Company Exclusions: Company-level exclusions only match against the company's domain field in your CRM, not the person's email domain. To ensure comprehensive coverage:
Add all domain variations to your company exclusion (e.g., both "gradient-labs" and "gradientlabs")
Consider creating parallel person‑level exclusions using email domains for critical lists like competitors or partners
This dual approach prevents contacts from slipping through due to domain mismatches or formatting differences
If you discover a typo in a company domain after upload, correct it at the source: for CRM‑sourced companies, update the domain directly in your CRM (e.g., HubSpot or Salesforce) and allow 15–30 minutes for the change to sync back to Unify; for CSV‑uploaded companies, re‑upload a CSV with the corrected domain using the exact headers “Company Name” and “Domain”, formatting the domain as a bare domain (e.g., loq.us, not http://… or www.).
Note: Companies are deduplicated by domain in Unify, so correcting the domain at the source is the only supported method to update it.
Advanced International Domain Patterns for Comprehensive Global Exclusions
Country‑Specific Educational Domain Extensions
Beyond the standard .edu domain, many countries use distinct educational domain suffixes that should be included in exclusion rules.
.edu.br (Brazil), .ac.uk (UK), .edu.au (Australia), .edu.sg (Singapore), .ac.za (South Africa)
.edu.cn (China), .edu.mx (Mexico), .edu.ar (Argentina), .ac.in (India)
Standard
.eduonly covers US institutions and will miss international universities entirely
Government Domain Variations by Region
Government domains differ widely across regions; using only .gov leaves large gaps.
European: .gov.uk, .gouv.fr, .gob.es, .gov.ie, .gov.it
Commonwealth: .gov.au, .gc.ca, .govt.nz, .gov.za
Americas: .gov.br, .gob.mx, .gov.ar, .gob.cl
Asia‑Pacific: .gov.sg, .go.jp, .gov.my, .go.kr
Strategic Advantage of Domain‑Based Over Name‑Based Filtering
Company name filters using English keywords (e.g., “university”, “government”, “ministry”) will fail to catch organizations with non‑English names such as “Universidade de São Paulo” or “Ministère de l'Éducation”. Domain‑based exclusions provide language‑agnostic coverage that works regardless of how the organization name appears in your CRM.
Implementation Strategy for Global Markets
Market‑Specific Domain Research – identify domain conventions for each country where your sequences might reach prospects
Tiered Implementation – start with your top 5 international markets, then expand coverage based on sequence reach
Validation Testing – create test audiences with known international contacts to verify exclusion effectiveness across different regions
Coverage Gap Monitoring – regularly review excluded contacts to identify new domain patterns from emerging markets
This is particularly useful for scenarios like removing prospects from sequences when opportunities are created against their accounts, even if the opportunity is created after the sequence has already started.
Common Sequence Enrollment Limitations Not Related to Exclusions
Several factors that can also limit sequence enrollment include:
Manual Enrollment Override Limitations
Global sequence exclusions cannot currently be overridden when adding contacts to sequences, even when enrolling them manually. If a contact matches an exclusion rule with “Exclude from Sequences” enabled, they will be blocked from enrollment regardless of whether you're trying to add them through automated audience enrollment or manual sequence enrollment.
Ruleset Re‑enrollment Restrictions and Manual Enrollment Troubleshooting
When attempting to manually enroll contacts into sequences, you may encounter “prospect already sequenced” errors even when exclusions aren’t blocking enrollment. This is typically caused by ruleset‑level re‑enrollment restrictions that control when and whether contacts can be re‑enrolled after completing or being unenrolled from sequences.
Understanding Ruleset Re‑enrollment Settings: Rulesets control two critical re‑enrollment behaviors that can block manual enrollment attempts:
Re‑enrollment cooldown period: Number of days required before a contact can be re‑enrolled in any sequence under this ruleset (commonly 30‑60 days; can be set to 0 for immediate re‑enrollment).
Allow re‑enrollment into the same sequence: Toggle that must be enabled to re‑enroll contacts into the specific sequence they were previously enrolled in.
Checking and Modifying Re‑enrollment Settings: To check or modify re‑enrollment settings:
Navigate to Settings > Features > Sequences > Rulesets tab.
Find the ruleset applied to your sequence.
Check the re‑enrollment cooldown period and same‑sequence toggle settings.
Adjust settings as needed and save your changes. Only users with admin permissions can modify these settings.
Alternative Workflow to Avoid Re‑enrollment Issues: If you need to make changes to an active sequence, edit the sequence directly and then upgrade all enrollments (active and queued) to the new version. This updates existing enrollments without requiring unenrollment and re‑enrollment, bypassing ruleset restrictions entirely.
Refine your exclusion filters to be more specific (e.g., adding additional CRM field conditions to narrow the exclusion criteria)
Temporarily disable the “Exclude from Sequences” toggle for that exclusion rule
Create more granular exclusions that don't affect the specific contacts you need to enroll
Paused sequence status – sequences that are paused will accumulate a backlog of queued enrollments that won’t send until the sequence is unpaused. Check the top‑right corner of the sequence view to verify the sequence status.
Immediate Impact of New Exclusions
When you add new exclusions (including bulk uploads of companies or contacts), any contacts matching those exclusion criteria will be immediately and automatically unenrolled from all active sequences where “Exclude from Sequences” is enabled.
This happens instantly upon saving the exclusion, not during the next sync cycle
Affects all active sequences simultaneously
Cannot be undone – contacts would need to be manually re‑enrolled if the exclusion was added in error
Maximum contacts per company limit

Already enrolled in another sequence

Missing routing rules for specific personas

Note: Currently, exclusions cannot be enabled/disabled at the individual sequence level. They are either applied globally to all sequences or none.
Template Variable Blocked Enrollments
If contacts appear as “Blocked” in a sequence’s Enrollments tab due to missing or invalid template variables, you can refresh the variables to attempt to resolve the issue.
Navigate to Sequences and open the affected sequence.
Select the Enrollments tab.
Filter the view to show Blocked enrollments.
Bulk‑select the affected contacts.
Click “Refresh template variables” to re‑evaluate and populate the required variables.
The system will attempt to resolve the variables and unblock eligible contacts.
Note: This refresh only works for contacts already enrolled but blocked due to template issues; it does not resolve exclusion‑based failures.
Play‑Specific Exclusion Management and Technical Behavior
Play Exclusion Settings Location and Behavior
For Plays: Exclusion settings can be accessed directly within the Play builder by clicking into the trigger node, where you can toggle exclusions on or off for that specific play's audience. However, if your play uses an audience as its trigger, the exclusion toggles at the play level will be greyed out and cannot be edited directly.
In this case, you must navigate to the audience itself to manage exclusions. Go to the audience configuration and edit the exclusions there instead.
Viewing exclusions applied to a play:
Navigate to the Play editor
Click into the trigger node and scroll to the bottom to see which exclusions apply
Play logs will show if a record was excluded and identify which exclusion caused it
Technical Timing Considerations
Exclusions are checked approximately every 30 minutes, which means contacts may occasionally slip through the initial check when first added to an audience or play. Due to this timing interval, contacts who meet exclusion criteria may be enrolled in a sequence initially but will be removed at the next exclusion check, provided the "Exclude from Sequences" toggle is enabled.
Retroactive Exclusion Behavior
When you enable the "Exclude from Sequences" toggle and save, the system will search for and automatically remove any contacts currently enrolled in sequences who match the exclusion criteria. This retroactive removal happens immediately upon saving the exclusion configuration, separate from the regular 30‑minute check cycle.
Workaround for Company‑Level Sequence Exclusions
Excluding Companies with Contacts Already in Sequences:
Unify does not currently support direct company‑level exclusions based on "has a person enrolled in a sequence".
Workaround: Use a CRM field at the company level (e.g., custom flag, lifecycle stage, or deal stage) that denotes "actively prospected" or "in sequence" status
Create a Company exclusion in Settings → Organization → Exclusions using that CRM field. This exclusion can then be applied globally or to specific plays to prevent duplicate outreach and avoid wasting credits on companies already being prospected.
Excluding Specific Contacts Associated with Deals vs. Company‑Wide Deal Exclusions
Unify's native deal/opportunity‑based exclusions operate at the company level only, meaning that any company with a deal in the targeted stages will have **all** of its contacts excluded.
Create a contact‑level field in HubSpot (e.g., a checkbox or select field like “Associated with Active Deal”).
Set up a HubSpot workflow to populate this field when contacts are linked to deals in the desired stages.
Sync the custom field to Unify via the HubSpot integration.
Create a people‑level exclusion in Unify that filters on the synced contact field.
Play Log Status Details
If a contact's sequence is terminated due to meeting an exclusion rule during execution, their enrollment status will show as "Completed: Excluded" in the Play logs.
Troubleshooting: Duplicate CRM Records and Missing Field Values
If contacts are being enrolled in sequences or appearing in tasks despite having company‑level exclusions configured, check for duplicate company records in your CRM. When multiple records exist for the same company, Unify may enroll contacts if any of the duplicate records match the sequence/play conditions, even if another record matches your exclusion criteria.
Example scenario:
Company A has two records in HubSpot
Record 1: Lifecycle Stage = "Opportunity" (matches exclusion)
Record 2: Lifecycle Stage = "Lead" (matches enrollment criteria)
Result: Contacts from Company A can still be enrolled because Record 2 matches
Missing field value scenario:
If a company record exists with the correct domain but the custom CRM field used in the exclusion rule (e.g., “ARR - Enterprise”) is empty, contacts will bypass the exclusion.
Check the Contact's Exclusion Tab (Recommended)
The fastest way to identify which exclusions apply to a specific contact:
Navigate to Contacts and search for the person by email
Click their record to open the contact profile
Select the “Exclusion” tab to see which exclusion rule(s) apply to that contact
Toggle Exclusions in the Play (Bulk Diagnosis)
If you're investigating enrollment drop‑offs for multiple contacts from an uploaded list or audience:
Navigate to the Play that attempted to enroll the contacts
In the play view, toggle individual exclusions on/off to see which contacts are affected by each exclusion
The contacts that appear/disappear as you toggle each exclusion are the ones being blocked by that specific rule
This method is particularly useful for understanding the delta between expected and actual enrollments
Remember that exclusion changes require approximately 30 minutes to take effect
Check Play Metrics
Open the Play that attempted to enroll the contact
Go to the Metrics tab
Click on the “Not Enrolled” count
Review the list of contacts and their specific failure reasons
Review Execution Logs
Navigate to the Play in the Play Builder
Click on the Execution Logs tab
Find the prospect's execution record to see enrollment status and any error messages
Duplicate Records Impact on Audience Filtering
When a company or contact has multiple linked records in your CRM, Unify evaluates audience filters against all linked records. If any linked record matches the filter, the entity appears in the audience, even if the primary record does not. Conversely, if a linked record that Unify evaluates lacks required field values, the entity may be excluded despite the primary record meeting the criteria.
Company‑level scenario: Company B has two HubSpot records – one in California with 5,000 employees (matches the audience filter) and one in New York with 1,500 employees (does not). The audience filter (State = California AND Employees > 2,000) includes Company B because the California record matches.
Person‑level scenario: A contact has two Salesforce records – one with “Most Recent Conversion” populated (qualifies) and another missing that field (does not). If Unify evaluates the record lacking the field, the contact will be omitted from audiences that filter on “Most Recent Conversion”.
To troubleshoot:
Open the company or contact record in Unify.
View the Linked Records tab to see all associated CRM records.
Identify which linked record satisfies (or fails) the audience filter.
Merge duplicate records in your CRM, ensuring the merged record retains all necessary field values.
Allow 15–30 minutes for the merge to sync back to Unify.
Re‑run the audience; the entity should now appear (or be excluded) as expected.
Temporary workaround: If an immediate merge isn’t possible, manually populate the missing field values on the record Unify is currently evaluating so the contact or company qualifies in the meantime.
Troubleshooting Exclusion Timing and Diagnostics
Exclusion Change Timing
Important: After making changes to exclusion settings, allow approximately 30 minutes for the changes to take effect before attempting to enroll contacts in sequences. This timing requirement applies to all exclusion-related changes, including toggling exclusions on/off in ruleset settings.
Troubleshooting Empty Audience Results
If you're building an audience and getting 0 results when you expect to see companies or contacts:
Check if universal exclusions are enabled for the audience - these are applied by default to all audiences
Temporarily toggle off exclusions at the audience level to see if excluded records appear
If records appear after disabling exclusions, review which exclusion rules are filtering out your intended audience members
Either refine your exclusion rules or keep exclusions disabled for this specific audience if appropriate
This is one of the most common causes of unexpected empty audience results.
Identifying Which Exclusion is Blocking a Contact
This is one of the most common troubleshooting scenarios when running plays on lists where only some contacts execute successfully.
Check the Contact's Exclusion Tab (Recommended)
The fastest way to identify which exclusions apply to a specific contact:
Navigate to Contacts and search for the person by email
Click their record to open the contact profile
Select the “Exclusion” tab to see which exclusion rule(s) apply to that contact
Toggle Exclusions in the Play (Bulk Diagnosis)
If you're investigating enrollment drop‑offs for multiple contacts from an uploaded list or audience:
Navigate to the Play that attempted to enroll the contacts
In the play view, toggle individual exclusions on/off to see which contacts are affected by each exclusion
The contacts that appear/disappear as you toggle each exclusion are the ones being blocked by that specific rule
This method is particularly useful for understanding the delta between expected and actual enrollments
Remember that exclusion changes require approximately 30 minutes to take effect
Check Play Metrics
Open the Play that attempted to enroll the contact
Go to the Metrics tab
Click on the “Not Enrolled” count
Review the list of contacts and their specific failure reasons
Review Execution Logs
Navigate to the Play in the Play Builder
Click on the Execution Logs tab
Find the prospect's execution record to see enrollment status and any error messages
Troubleshooting: Why Didn't All Contacts from My List Execute Through a Play?
If you run a play on a list and only some contacts execute successfully, exclusions and enrollment limitations are the most common causes. Here's how to diagnose and resolve this:
Quick Diagnosis:
Check the Sequence's Enrollments tab (fastest method for bulk enrollments) – navigate to Sequences, open the relevant sequence, click Enrollments, and review the Not Enrolled breakdown to see per‑contact failure reasons
Check individual contact profiles from your list by navigating to their Exclusions tab to see which exclusion rules apply
Review the Play's Metrics tab and click on the “Not Enrolled” count to see specific failure reasons for each contact
Check the Play's Execution Logs tab to see enrollment status and error messages
Verify the sequence status in the top‑right corner of the sequence view to ensure it’s not paused, which would cause enrollments to queue rather than send
Understanding Enrollment Drop‑Off Causes:
Exclusion rules (global exclusions, ruleset‑level exclusions, or the “Exclude from Sequences” toggle)
Re‑enrollment cooldown windows preventing contacts from being added to sequences they were previously enrolled in
Mailbox or sequence sending limits causing enrollments to be queued rather than immediately active
Opted‑out contacts or missing/invalid template variables required by the sequence
Paused sequence status causing enrollments to queue indefinitely until the sequence is unpaused
Understanding Exclusion Layers:
Global exclusions (Settings → Organization → Exclusions) apply across all sequences by default
Ruleset‑level exclusions can be toggled on/off for specific rulesets without affecting global settings
The “Exclude from Sequences” toggle on each exclusion determines whether it blocks sequence enrollment
Safe Workflow to Temporarily Bypass Exclusions for a Specific Play:
Identify which specific exclusions are blocking your contacts (using the diagnosis steps above)
Go to the Ruleset that your sequence falls under (Settings → Features → Sequences → Rulesets tab)
Turn off the sequence toggle for that specific exclusion in the ruleset settings
Wait approximately 30 minutes for the change to take effect
Duplicate the play and re‑run it
Turn the exclusion back on in the ruleset immediately after enrollment completes
Warning: Do NOT turn off global exclusions to bypass this issue, as that would affect all sequences across your organization and could cause unintended enrollments elsewhere. Always use the ruleset‑level toggle instead.
Verifying Exclusion Activity
To verify when contacts have been excluded from sequences, check exclusion activity in these locations:
Contact Activity Tab: Navigate to the contact's profile in Unify, click on the Activity tab, and view sequence enrollment history and exclusion events
Play Logs Tab: Open the relevant Play from the contact's activity log, navigate to the Logs tab, and review run history with exclusion reasons
Note: To see exclusion activity for contacts who match your audience criteria but are excluded from enrollment, ensure your Play settings allow re‑runs. Otherwise, no new activity will be logged after the initial Play execution. Improvements are planned to surface exclusion information directly at the contact level, which will make this troubleshooting process more straightforward in the future.
Understanding the “Exclude from Sequences” toggle
Toggle ON: Contacts are removed from active sequences when they meet exclusion criteria (proactive unenrollment)
Toggle OFF: Existing sequence enrollments continue uninterrupted; only new enrollments are blocked
Method 4: Test with a Temporary Audience (Current Workaround)
If the above methods don't provide enough detail, you can identify which exclusion applies by:
Create a new audience using the prospect's email address
Toggle individual exclusions on/off in Settings > Organization > Exclusions
Check if the contact appears in or disappears from the audience as you toggle each exclusion
The exclusion that causes the contact to disappear is the one blocking enrollment